Showing posts with label Kitchen. Show all posts
Showing posts with label Kitchen. Show all posts
Friday, January 2, 2015
Frozen Water Pipes: How to Work in the Kitchen Without Running Water
My video on working while waiting for frozen pipes to thaw. :-) I hope this will be helpful to you in keeping "real life" going while conserving water in the kitchen when the water is off or the well is dry! I am going to use these techniques while camping too! :-)
Sunday, July 13, 2014
How To Make Whipped Cream Without An Electric Mixer, Using Only a Whisk

A little secret about milk is that the higher the fat content, the longer it will keep in the fridge. So "Heavy Whipping Cream", which has so much fat you could make butter out of it, can be bought a week or two ahead of time to be used for making whipping cream at a moment's notice.
My grandmother, Mema, made whipped cream from scratch - we never had cool whip or dream whip. It tastes divine and once you have developed a taste for it, the other products taste artificial and waxy. She used an electric mixer and I usually do too, but for a small amount to serve one or two people, it is just as fast to whip it by hand.

Here is how you do it:
Buy only heavy whipping cream or whipping cream. You can't use coffee cream or half and half. You can't use "fat free" cream. Highest fat content is essential. Keep it very cold, but don't freeze it - alas nearly every brand today has additives that cause it to separate when frozen.
You can freeze the BOWL though, and using a chilled bowl will make it whip faster.
Pour about 1/2 cup to 3/4 cup of heavy cream into your chilled bowl and beat with a whisk (any kind of whisk will work as long as it is clean - don't use a bamboo one unless it is new, because they are hard to clean completely and may retain oils and flavors of other foods they were previously used with).

Beat for about 1 minute, then add one Tablespoon of granulated cane sugar. You don't need much sugar usually because the cream itself is naturally sweet. So take it easy, you can add more later if it isn't sweet enough. Also add 1/2 teaspoon of vanilla extract (vanilla also heightens the sweetness of foods, reducing the amount of sugar needed). Continue beating for another two minutes or so until the cream is stiff enough for your liking. Taste and see if it is sweet enough.

Refrigerate any leftovers immediately. :-)
Saturday, June 8, 2013
A Little Help That Makes Me Happy Every Time I Load The Dishwasher

Solution? An empty liquid coffee creamer carton. We used a funnel to pour it full and our problem was solved. The one we use is from Coffee Mate Brand, but probably any of them would work.
What is crazy is, we both liked this solution so much that we continue to transfer the dishwasher detergent powder into this bottle regardless of what size box we buy. It is amazing - I can pour the exact amount of powder into the little well. I never waste by pouring too much, and I never spill it.
I never knew that putting soap in the dishwasher was a chore until we found an easier way to do it. Now every time I load the dishwasher, I smile when the last dish is loaded and it is time to pour the soap!
As my little bio over there in the sidebar notes "I am easily amused." Especially when things are nicely organized. :-)
Sunday, April 21, 2013
Goodbye HFCS! How To Make A Small Batch of Homemade Tomato Ketchup in a Crockpot

We are not unduly careful about what we eat: we prefer fresh, real foods but do not insist on organic; we trust our bodies to balance our diets, rather than following elaborate prescriptive eating plans; we don't buy food processed in China, but are ok with Mexican tomatoes during the winter months (from a locavore perspective, Mexico is closer to us than California LOL!)...
Still, my husband Paul has had a growing concern about the pervasiveness of High Fructose Corn Syrup in processed foods. We've started avoiding those things that have this ingredient. Ketchup is a bit of a problem, since most brands contain HFCS and we like our ketchup!
I'd never made it myself since most recipes are for huge batches, calling for bushels of fresh tomatoes. Not only the investment, but what if we didn't like that particular recipe? DIY is foolish if it is wasteful! So I was pretty excited to find this simple, small batch version on Instructables.com.
The original recipe is from Instructables member Scoochmaroo. Her basic recipe is very good as it stands. I made a few adjustments - mostly, to allow it to be cooked in a crockpot, so that I wouldn't need to stand over the stove and watch it. My recipe is below.

Easy Small Batch Crockpot Tomato Ketchup
2 (6 ounce) cans tomato paste (total of 12 ounces tomato paste)
1/2 cup white vinegar
3 teaspoons molasses
4 Tablespoons brown sugar
1 Tablespoon onion powder
1 teaspoon garlic powder
1/2 teaspoon ground allspice
1 teaspoon salt
Mix all ingredients together in a small crockpot* and cook on low for 4 hours. To cook on top of the stove, add one cup of water to the recipe, bring to a boil, then simmer, covered, on very low heat for an hour or two, stirring every 15 minutes, until thickened. Cool, pour into a clean, sterile container, and refrigerate.
*I have a small "Crockette" that I used for this. If using a larger crockpot, I would probably double the recipe, just to give it enough bulk to cook properly.

This recipe makes about 3 cups of ketchup (depending on how much water you add). It can be used immediately. The vinegar will preserve it, refrigerated, for a couple of weeks. I will just keep the ingredients on hand, and once a month or so will pop a batch into the slow cooker while we go about our business for the day.

We had this with our burgers tonight, and Paul said "That is some good ketchup!" YAY! I won't even have to fiddle with the spice mix.
It doesn't taste like "homemade ketchup", it tastes like plain old ordinary ketchup - which is, after all, what we really want on our salty french fries!
Enjoy!
Friday, January 6, 2012
How To Section a Grapefruit (or an Orange) and Remove the Membranes
I nearly forgot to share this. and here we are in Texas Citrus Season again. The sweetest, most amazing grapefruits in the whole world are those grown in Texas. The flavor of Texas citrus is unsurpassed.
Paul showed me how to section a grapefruit a few years ago, and it is brilliant. He was smart: now, when the Texas Ruby Red Grapefruits are ripe, I section a whole bag of them and put them in a big jar in the fridge. So he can just dish them out for breakfast.
This method can also be used for oranges, and will really improve your Ambrosia (with or without marshmallows ;-)).

Here's how:
Using a sharp knife, cut off the ends and down each side of the grapefruit, removing all the rind and white and exposing the fruit.
Work over a large, shallow bowl to catch all the yummy juice. This is a messy task. Wear your old apron and have a dishtowel handy.

Hold the peeled grapefruit in your "off" hand (non-dominant) and run the knife blade carefully down between the membrane and one section. When you reach the bottom of that section, slide the knife along and up the other side of the same section, so that the single section is separated and will drop into the bowl.


Repeat until all are removed. It sounds a lot harder than it is - in reality, the sections slide away from the membrane easily. Do be careful with the knife though. No need to hurry or take risks. I am a lefthanded clutz, so often I will use a serrated knife (with ambidextrous or lefty serrations) to avoid cutting myself.

When all are done, remove all the seeds and put into a clean mason jar, and refrigerate. I don't know how long they will keep, because we always eat them all within 3 or 4 days!
Wednesday, January 4, 2012
Devil's Food Torte with Raspberries
Paul had a birthday recently, and it was a big one milestone, so we had some of our friends over for cake. When I asked Paul what kind of cake he wanted, he started talking about mocha and raspberries and oh my. I found a recipe and adapted it to fit. It turned out gorgeous! Looks great and tastes perfect. Several people have asked for the recipe,so here it is.
Devil's Food Torte with Raspberries
Make cake and chill for 8 hours before serving. It should keep well, refrigerated, for at least 24 hours.
1 Devil's Food Cake Mix (I used Duncan Hines)
Leftover brewed coffee to substitute for water called for in cake mix
Eggs and oil as called for in cake mix
2 layer cake pans
Use shortening to grease the cake pans and dust with flour. Set pans on baking sheets "just in case" to prevent overflows. Preheat oven.
Prepare the cake mix according to package directions, using whole eggs and oil, and substituting coffee for the water called for. Pour into pans and bake as directed for layer cake pans. Test for doneness with a toothpick at earliest time. Remove from oven and cool in pans on wire racks for 15 minutes, then turn out of pans and finish cooling on wire racks with top side UP. Cool for at least one hour.
2 cups heavy whipping cream (I used Kroger brand)
1 8 ounce package cream cheese (not low fat)
1/2 cup granulated sugar
1 teaspoon real vanilla extract
Use electric mixer and beat cream until very stiff. Set aside.
Put cream cheese into large bowl with sugar and vanilla and beat on high until fluffy. At low speed, gradually fold in whipped cream.
Divide this frosting into 4 relatively equal portions (one can be larger than the others for the top and for "leftover")
Assembling and icing the cake:
1 can raspberry filling (can't remember the brand, but it wasn't a very big can) to glaze the layers with
1 package fresh raspberries
While layer remains on wire rack, use a bread knife (or your electric knife if you don't have a bread knife), and carefully trim the convex part off the top so that it is flat. Don't worry about how it looks, only that most of the top be mostly flat. (Set the trimmings aside to make yourself & your sweetie a little "preview parfait" out of the leftover ingredients)
Then, hold your bread knife flat and cut the layer in half horizontally. Carefully lift the top and set it onto your cake plate.
Open the raspberry filling and use your spatula to spread a VERY THIN layer on the top of the layer. It should be thin, just enough to glaze the top.
Take a few fresh berries (the ugly ones) and crumble them and scatter on top.
Clean spatula, then spread the cream frosting thickly on top of the glaze, letting it kind of stray over the edges a bit.
Set the other layer right on top of all this and do exactly the same thing all over again.
Split the next layer and repeat.
When the top is iced, smooth it a little, and arrange the prettiest raspberries on it.
Refrigerate until ready to serve. By chilling it for several hours, it will hold together well and you won't need skewers to hold it together.
~~~~~~~
We had coffee ice cream with it, and it was perfect! Paul says it is one of the best cakes he has ever eaten. I was so pleased! I have never been much of a baker but it starts to look like I have taken it up as a new hobby by accident. :-)
Thursday, October 20, 2011
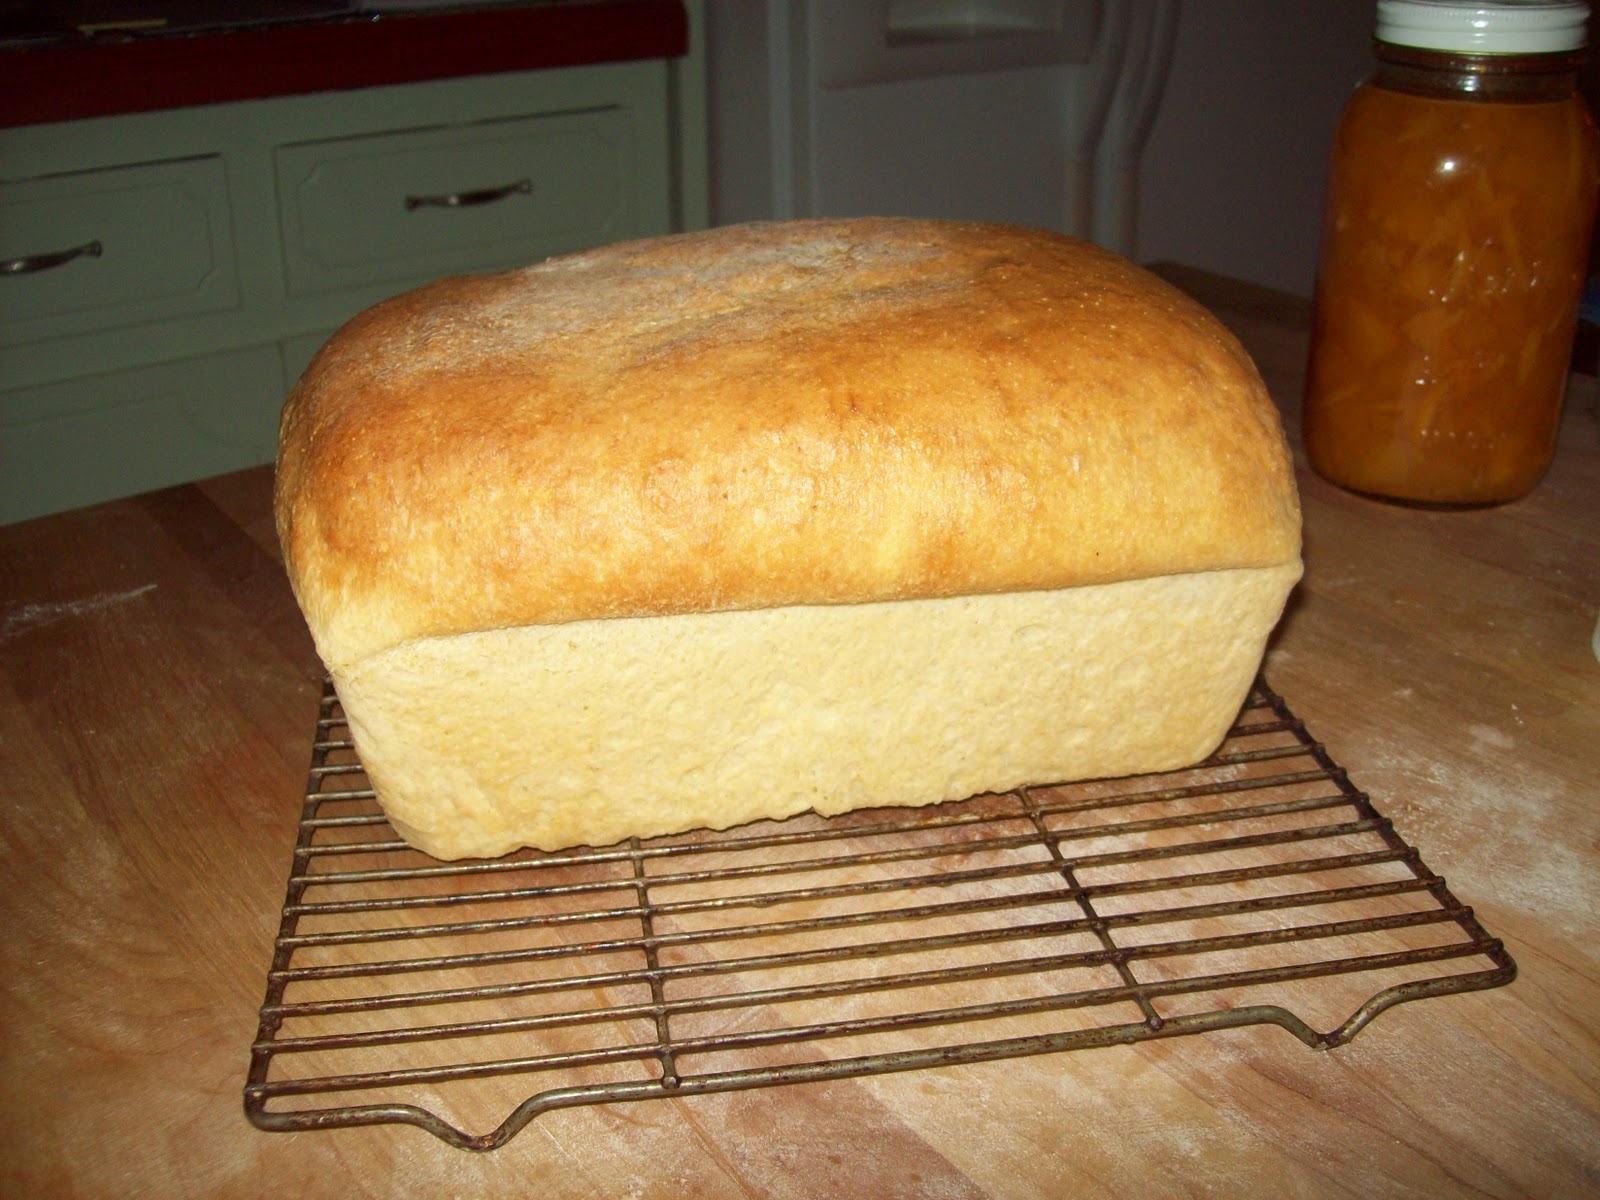
Learning How to Make Real Yeast Bread From Scratch - in Two Hours!
Last winter, I tried, unsuccessfully, to make homemade yeast rolls. I say "unsuccessfully" because they turned out exactly like cheap brown-n-serve rolls, except they took me all day (and 3 risings) to make.
Last weekend, I decided to keep trying until something worked. My recipe uses a method my grandmother learned in a breadmaking class 30 years ago. I chose it to start with because it is FAST (from start to baked in about 2 hours), and because it makes only one loaf (so less waste from failed experiments).
My first loaf, following the recipe & directions sort-of, was a pitiful failure. It used whole wheat flour, which made it heavy and dull. And when the instructions said "makes 2 small or one large loaf", I thought standard loaf pans were "small". Wrong. I crumbled it and dried it to put out this winter. Maybe the birds will eat it on snow days, if they get hungry enough.
So I immediately made another. This time, I tried one of the alternatives in the recipe and used plain white flour. But their idea of "enough flour" is not enough for my oven, I guess, because this loaf - although better than the first - was still too weak to reach the top of the loaf pan. More bird bread (although we did eat a few slices of this, and praised the flavor).
Paul made a couple of observations - one of which was to add more flour until the dough would have the strengh to stand up to the yeast - and I started again.
Success!!!! My husband went from amused skeptic to excited fan. He says that if I'll make a loaf of this every week, we will not need to buy bread any more. Right now, it is fun - only time will tell if it becomes a habit! But I did make another loaf, just as lovely & tasty, a few days ago, so it was not a fluke. :-)
Without buying in bulk, this bread costs about 94 cents per loaf to make (including electricity for the oven). The two most expensive ingredients are yeast and flour. If I buy yeast by the pound, and flour by the 25 pound sack, we could probably reduce that by 35 cents. Baking in a gas oven (or in, say, Idaho, where electricity costs half what it does in Texas, thanks to Federal dam projects of yesteryear), would shave another 6 cents off, bringing cost per loaf down to 53 cents.

It is simple enough that I could make a loaf after work - which is what I wanted. I simply do not have enough free time to bake, otherwise. Here's my final recipe:
One Fine Loaf
Before starting, turn oven light on, but DO NOT preheat oven. The heat from the light bulb will create a warm space for the dough to rise in.
1 1/2 Cups white flour
1/2 Cup cornmeal
1 teaspoon salt
1 "scant" Tablespoon active dry yeast (or one package)
Mix these together. Then add:
1 Tablespoon cooking oil
2 Tablespoons cane syrup or golden syrup
1 2/3 cup hot tap water (hot to touch from the faucet, ~120 degrees F)
Beat for 2 minutes with electric mixer on medium (I used Paul's Kitchenaid) or by hand - you could even use an egg beater at this stage).
Add: 1 1/2 Cups white flour
If dough is still too sticky to remove from the bowl add another 1/2 cup to 1 cup white flour. The total amount of flour may vary from day to day.
Beat with dough hooks in a Kitchenaid mixer at medium to med-high for 3 minutes. Or knead vigorously by hand (to knead by hand, turn out onto a floured surface, flour your hands and knead until smooth and elastic).
Cover with a towel and allow to rise for 20 minutes. I accidentally skipped this rise and my bread turned out fine, but it will be better with it.
Grease one loaf pan with shortening (rub the entire inside of the pan and the top edge with a light coating of hard shortening or lard).
Punch down dough, turn over, tuck edges under to put the pretty side up and drop into the loaf pan.
Set the loaf pan in the oven, close the door and leave the light on (but do not start the oven yet).
Allow to rise until top of loaf is above the top of the pan, about 1 hour.
Optional: When loaf has risen but before turning the oven on, carefully brush the top with an egg wash (mixture of raw egg and 2 tablespoons water). Don't use all the egg wash on it, just enough to dampen the top. This will give the crust a nice shine.
Put loaf in center of oven, close the door, and turn the oven on to 350 degrees Fairenheit. No preheating needed - this loaf benefits from the gradual increase in temp that occurs if it is in the oven while it is heating.
Bake for 35 minutes.
If you did not do an egg wash, brush the top crust with melted butter as soon as you take it out of the oven.
Immediately turn the pan over and remove loaf from pan. If you thump the bottom, it will sound hollow. Cool upside down on a wire rack for 5 minutes, then turn upright and let sit on rack until fully cool - or until you can't wait any longer!
If this loaf was not perfect, make another asap, and keep trying until you love the results.
While baking is a science, it's a homely one, and that means there's a bit of artistry to it as well. You can bake beautiful bread - just make it until you do!
Saturday, July 23, 2011
Display Ideas For Vintage Recipe Booklets
A lot of my collections are made of paper. Vintage advertising recipe booklets are one such, and I have a few I just couldn't part with. Colorful and witty, those cute little recipe folders are just too fun to leave in a drawer.

I mean, in our Tex-Mex kitchen, who could resist 1920s and 1930s "Tasty Tested Anglo Recipes", "Gebhardt's Mexican-Style Foods" and "Walker's Red Hot Chile Con Carne"? The Walker's one, red with a bright green sombrero, is actually from 1918, the WWI era.
The company was based in Austin, Texas. Gebhardt is also an old Texas company - I still use their chili powder today for general cooking (I use Morton's Chili Blend for actual chili). And Anglo not only made canned hams and corned beef, but also advertises Deviled Ham, Deviled Tongue and Liver Spread!

One of the little projects I've had on my list was to find a way to display them that didn't take space away from some other wonderful thing that needs a prominent home!
Inspired by my new cabinets, I finally got around to it last month.

This is a super-simple project. I used the hard clear cases that sports cards collectors use, and glued a piece of sheet magnet on the back. It's a good use for those magnetic business cards we keep long after the realtor pictured has moved on.

Voila! (which is how the word "Walla!" is spelled!)
Refrigerator magnets that can be changed out, and the keep the booklet available, just in case we suddenly decide to try that recipe for jellied liver tea sandwiches.
Aren't they cute? If you have other ideas for showing off vintage paper, please share! There's always something cute that needs just the perfect treatment....
Sunday, July 10, 2011
Proud Mom Says "Hello Beautiful New Kitchen! "
Kids. You bring them into the world, feed them their spinach, teach them the things you know, worry about them constantly, and what do you get?
Well, this summer, I got a gorgeous new kitchen!
And all I asked Devin to do was to take off the old counter top and put down new cement board so that I could tile the counter.
Did he listen? Nooooooo. He said we needed new cabinets, nicer ones. I said we couldn't afford that. He said That's ok, he would build them. And he did.
Aren't they marvelous? They have a kind of Arts & Crafts character that fits well with the house, and help the tiny kitchen feel more substantial. I still need to paint the ceiling and do a few other things but couldn't wait any longer to share the pictures!

He raised the upper cabinet on the far left so that Paul's Kitchenaid mixer would fit under it. So finally, we don't have to store it elsewhere and haul it over to the counter to use it. As a result, I've used the stand mixer more in the past couple of months than I did in the past five years!
The glass doors were his idea too. That lets us show off some of the vintage dishes we've collected, and that we use daily.
The kitchen sink was the only splurge I made (it cost more than the dishwasher - which, BTW, I got from a small Sears Catalog Store for a very good price). Originally, I wanted an undivided deep sink, but no porcelain enamel ones were available locally, so I settled for this one, which has a low divider only a few inches high. It really gives us the best of both worlds! Our largest bowls and cookie sheets will fit under the faucet, yet we can still run a sink of dish water.
It's a good thing Devin is strong... he swears the sink weighs 300 pounds! Can I help it if cast iron is heavy? ;-)

The tile work was a joint Son/Mom project and I did a lot of the work (Devin made the complex cuts and laid the straight lines). I still have to finish the trim tiles around the top of the back splash - couldn't install them until he'd completed trimming out the cabinets.
I used plain white 4"x 4" tiles. At 16 cents each, they are a great bargain. The glass mosaic accent tiles came in 12x12 sheets and we cut them apart to highlight the backsplash.We learned long ago to never never never use white grout! The grout used here is called "earth" color: it is exactly the same color as coffee stains. On purpose. I sealed it anyway but with that dark color, no matter how much coffee we manage to spill all over the counter the grout will always look good. :-)
Instead of using tile to edge the countertops, Devin used wood trim, stained and finished to match the cabinets themselves. As a result, the whole thing looks like a piece of furniture with the top integral to the base.

When I got ready to tile the divider that separates the kitchen from the living room (the only remaining original cabinet), the sheets were on clearance, so I was able to get enough to complete the entire top for about $30. It is dressier than the others, so makes for a nice transition.

I've shared Devin's handiwork on here before. He and Nicolas both enjoy woodworking. Their great-grandfather taught them the basics in his shop from the time they were small. Watching either of them work, I'm reminded of how Nandy worked: patient, methodical, thoughtful. Devin made an interesting observation while he was here. He commented that he's come to realize that Nandy was "a practical carpenter" - his work was always made with an eye to being useful, good for its purpose, rather than designed for appearance.
Devin's artistic talent joins his practical heritage in the things he builds, so the results reflect fine design and lasting beauty, as well as being perfectly formed for their function.
Devin and Sandy are moving in about a month to the Irving Texas area. Sandy has started a new job, and we thought for a while they would move far away. After he rushed to complete the kitchen before their move, they learned that instead she can work from Texas. So Irving it is. We are so delighted they will still be nearby.
And not just because he keeps remodeling the house for us! Heh!
Monday, July 26, 2010
Putting Up Peaches: Peach Chutney For A Change
It's Peach Season! Time to eat all we can and can all we can't. ;-) I love canning - it's one of those tasks where we get to enjoy the fruits of a day's work for a long time.
The jar to the far right is Peach Chutney I made last year. It turned out great! It is wonderful with roast poultry and makes a really nice alternative to cranberry sauce. We can't grow cranberries in Texas so this is a good thing for those trying to eat locally or do the "100 mile diet" bit. Aside from some of the spices, all the ingredients either were local or "could have been" homegrown.

Personally, I don't think we should count the spices when trying to eat locally, because spices were one of the early commodities traded as far back as stone age people thousands of years ago - right up to what is now called "The Spice Trade" explosion in the 15th century Age of Exploration. It's why Columbus discovered America: looking for a shorter trade route to the continents and islands of the Orient (the Orient - from the Latin root "orientem" meaning the direction of the sun rise - was the Eastern world, the Occident, from L. "occidentem", direction of the sunset, was the word for the West), where all sorts of wonderful spices originated.
I found the original version of this recipe for "Spicy Peach Chutney" on Allrecipes.com, submitted by "Shana":
Original Recipe Yield 6 - 1/2 pints
Ingredients
* 4 pounds sliced peeled peaches
* 1 cup raisins
* 2 cloves garlic, minced
* 1/2 cup chopped onion
* 5 ounces chopped preserved ginger
* 1 1/2 tablespoons chili powder
* 1 tablespoon mustard seed
* 1 teaspoon curry powder
* 4 cups packed brown sugar
* 4 cups apple cider vinegar
* 1/4 cup pickling spice
Directions
1. In a large heavy pot, stir together the peaches, raisins, garlic, onion, preserved ginger, chili powder, mustard seed, curry powder, brown sugar and cider vinegar. Wrap the pickling spice in a cheesecloth bag, and place in the pot.
2. Bring to a boil, and cook over medium heat uncovered until the mixture reaches your desired consistency. It will take about 1 1/2 hours to get a good thick sauce. Stir frequently to prevent scorching on the bottom.
3. Remove the spice bag, and ladle into hot sterilized jars. Wipe the rims with a clean moist cloth. Seal with lids and rings, and process in a barely simmering water bath for 10 minutes, or the time recommended by your local extension for your area. The water should cover the jars completely.
I used fresh peaches I had just picked off the tree, but it can as easily be made with canned, frozen or dehydrated fruit. You could even use your peach jam (I'd leave out the sugar in this recipe if I were making it with jam).
To make Peach Chutney using dried peaches, pour plain hot water over the fruit in a ratio of 1 1/2 cups water per cup of fruit and let soak for an hour. Don't add the sugar yet or it will keep the peaches from absorbing the water. Measure out 6 cups of reconsituted peaches and use in place of the fresh peaches called for in the recipe.
This recipe, like many pickles, is best after it has had time to age for at least 2 months. Made at this time of year, it was perfect by Thanksgiving, and we enjoyed it all the way through the winter.
Tuesday, April 27, 2010
What's in Our Refrigerators?
Pat over at And So It Goes In Shreveport picked up on Ann Althouse's post and is inviting the public display of what's inside our refrigerators. Ha! Great meme for those of us in Texas who didn't let the Appliance Stimulus Package * entice us to exchange perfectly good and well made ice boxes for shiny new ones. :-)
It's fun how interesting the mundane things of our lives can be, isn't it?

*whispering* I'm not sure where the 87,000 new jobs are supposed to be created, because when we bought our new freezer last year, we shopped several places looking at major brands and learned that only Frigidaire still makes refrigerators in the US (and that from foreign made parts) - most appliances of all types are manufactured abroad...
Anyway, here's our fridge - complete with the boxes of Brie I found on sale! Like Pat, we also are blessed to have a freezer full of good food.
Are you brave enough to show off your cooler? Go on over and join the blog party!
Friday, February 5, 2010
Home Made Croutons
Here is how Paul makes croutons. We use these for his Caesar Salad (recipe just posted today - see below) and - one of Thelma's innovations - in our Split Pea Soup. Like everything, the better the flavor of your olive oil and butter, the better the final product will be.
Cut stale bread into cubes the day before and let dry. You can also use dried french bread as we did here, but it is easier and tidier to cut it before it dries.

In a large skillet, heat a couple of tablespoons of Extra Virgin Olive Oil and add an equal amount of butter.

When melted, throw in the bread cubes and toss quickly so that the oil gets on each piece.

Toast over medium high heat, turning each with tongs as it browns until all sides are brown.
 Drain on brown paper (brown paper grocery sacks are the best) or paper towels.
Use right away, or store at room temperature. They will keep for a few days, unless people come past and snack on them! :-)
Saturday, September 19, 2009
Orange Zest, Candied Carrots and Helping Out
Our county has a shared Christian social ministry center that all of the local churches, local businesses, and local people help support. It is called Good Samaritan Ministries (www.goodsambwd.org) and includes a food pantry along with other services. People can come once each 30 days and get a grocery cart full of food, enough to feed a family for at least a week
- or more depending on famly size - and usually this even includes fresh frozen meat - even venison!
Volunteers from our church are responsible for the food pantry two days a month, and I try to go and help when I am off. My task is usually to help fill sacks with groceries. It is a lot of fun. Friends from church who are usually busy get a chance to visit with each other, and it is all good.
The people who come for food do not want to be wasteful so there is a bin where they can put back things they will not use. I noticed that one thing a lot of people put back are canned carrots. Plain old canned carrots are not my favorite either. I make a candied carrots dish that is easy to make and most ingredients are in the average pantry.
 With permission from Good Samaritan's managers, I bought enough fresh oranges and made enough copies of the recipe to be able to give one to each family on "our" day along with their can(s) of carrots.
This was during a time when oranges were plentiful and on sale at the store, so it did not cost me much to buy the 5 bags necessary to have one for each of the 50 or so families we serve on the days our church works. It was a one-time thing, too, so it did not create expectations or cause a hardship to do this.
Here is my recipe for Candied Orange Carrots:
1 can of carrots
Juice of 1 orange or 1/2 cup of orange juice
1 Tbls of orange "zest"*** if available
1/4 cup sugar or honey (can also substitute brown sugar or syrup of any kind)
Mix together carrots, orange juice, orange zest and sugar or honey.
Simmer uncovered for 10 to 20 minutes, stirring occasionally. Serve with any meal.
If you have Orange Marmalade, or peach or apricot jam, you can mix 1/2 cup of the jam with the carrots instead of using orange juice, peel and sugar.
 *** "Zest" is citrus peel - just the orange (or yellow or green) part of the peel. Lemon zest and orange zest are most often called for, but you could make tangerine zest and lime zest. Remove in strips from the orange with a potato peeler or run the whole orange across a grater to
get the zest. There's even a special little tool you can get that takes the peel of in skinny strips.
You can dry or freeze the extra for future use. To dry it, just let it sit out on the counter until it is dry! It will keep for ages in a jar in the pantry. It is useful for cooking and baking with, and is great steeped with hot tea.
 I wasn't able to be there that day, but they told me a lot of people thought it sounded good and said they were going to try it. They made extra copies of the recipe and put one into each family's sacks for the whole month.
There's been a 29% increase in the number of families served with food this year at Good Samaritan. It has jumped from around 600 families each month to nearly 800 per month. And there is always a rise at Christmas time, so we can expect that there may be a thousand families
for December in our little county.
 Often charities need gifts of our time even more than money. With that many more people to serve, more helpers are needed to fill bags and do paperwork, otherwise people who come for groceries have to sit and wait a long time.
I am sure it is the same in your town. So if you have a little time to spare - even if only once in a while - it will be appreciated.
PS They don't call those graters "knuckle busters" for nothing! Careful not to grate your hand. If you do, the sticker on the fruit makes a handy make-do bandaid. ;-)
Saturday, September 12, 2009
Thrifty Happiness: Red Points used Wisely

Brookshire's has pork chops on sale for 99 cents a pound! Even though there is a limit, I was able to get enough to put away 6 packages of 4 chops each for a sum total of about $9.50. Talk about wise use of "red points"! I am so pleased.
"Red points" is a phrase from the days of Rationing during WWII in the 1940's. The war actually started in September 1939, but the US did not enter the war until after we were attacked by Japan in December 1941. So this month is the 60th anniversary of World War II.
Since everyone was fighting each other, imports and exports were all interrupted. This, along with the need to switch manufacturing from plowshares to swords, meant shortages for many types of goods. We'll talk about the great dearth of toys and how Americans (including Mema and Nandy) responded to that on another day.
Thus, during the war, the government set up a rationing system to help spread out limited supplies so that everyone could have their share. There were points for gasoline, tires, sugar, butter, shoes - and meat. Red points were for meat. Thrifty wives used their red points carefully so as to stretch their meat budget as far as they could. They sort of rationed themselves in the use of their ration books.
 You can learn more about how rationing actually worked, in the PBS program "1940s House". It is available from Netflix. Not all of the period house series are good but this one is, because the family made every effort to be true to the times and to really live as a London family would have lived during the Blitz. Although it is set in England, many elements of the time were the same here in the USA.
Aren't these spoons neat? One is engraved "Thrifty" and one "Happiness". I have had them for so long that I don't remember where I got them. Originally, they probably came in oatmeal or laundry soap or as a grocery store promotion on the 1940s or 1950s. I always watch for others with industrious mottos on them but have never found any more.
Tuesday, September 8, 2009
How to Organize a Chest Type Freezer Part 2
When I looked around the net for tips on organizing a freezer, three great ideas were to use stackable tubs, to separate beef, pork, and chicken, and to color code. To this I added my own preference to stand things upright in the bins, like a filing cabinet. That way I can see everything in each bin at a glance. Think vertically.
I measured everything, length, depth, width, including the width of the step in the bottom of the freezer, to be sure I would get bins that fit. I found these at the Dollar store in with the school supplies for $2 each. It would also be very easy to just use heavy cardboard boxes - cut hand-holds in the sides and don't worry about color coding.

Here are the first three baskets. We have a lot more beef than anything else right now and I separated the ground beef to its own tub. I put it in the bottom one just because. :-)

Here is the second tier. The chicken is on the left - there's only room for one basket on that side, because it sits on top of the step, and the basket that came with the freezer will fit over it. I put vegetables in the middle one. I filled the space in the back (outside the bins that are just a couple inches too short) with the large bags of blackberries and okra, standing upright. Those are large enough they will not fall over and get lost and since it is only those two things I will not forget they are there.

We don't have much chicken right now so packaged cheese (a good sale) filled the rest of that bin. It is important to fill all the space - the freezer will use less electricity and hold the cold better if things are packed tightly together. If you don't have enough food in it to fill the freezer, store bags of ice or gallons of frozen water, then you can remove them as needed to make room for food. Just be sure you can still close the lid effortlessly so that it will seal properly.
 The top bins are for small packets, odd sizes, and things we will want to get to right away. Later on, when I have more packages of bell peppers, I'll probably give them their own bag that can sit down in one of the lower bins so they won't be exposed to warm air when we open it.
Speaking of warmth, this freezer will need to be defrosted once each year or two. It will hold the food far better than self-defrosting ones that work by actually warming up the sides of the freezer enough to melt the frost. It is no trouble to defrost it myself, plus that is good incentive to use up the food that is in there so we do not waste.
Right now, this arrangement looks good. We will see over time how well it actually works in practice.
Tuesday, August 18, 2009
FDR's Little White House: A Simple American Home
Last summer, we went to the Little White House, in Warm Springs, Georgia. This is where President Franklin Delano Roosevelt spent much time during his presidency, and where he passed away in April 1945.
The thing that most struck me about this house is how very ordinary it is. Anyone's grandmother could have lived here. There was no ostentation, no luxury. It is a simple home with maple furniture, twin beds, well-read books near the fireplace, and the comfort of homeliness.


 The kitchen had no cabinets, only open shelves along the walls. The things we would put into cabinets were stored in the pantry/closet - it was lined with shelves and is shown in the first picture, above.

They told us the living room is exactly as it looked the day he passed away. The nautical decor was a favorite of his, as he was a Navy man.
 President Roosevelt's bed, on which he was lying when he passed away suddenly from a stroke. The room is very small, with a single bed, and the furniture you see is pretty much the whole of the room. It is located right off of the living room.
 This was Eleanor's room, with a pair of twin beds. The guide told us that their children especially enjoyed coming to The Little White House, and would stay here in Mrs. Roosevelt's room when they came.

 The Dining Room is not separate, the table is simply across the room from the living area, with the hutch sitting opposite the fireplace shown in the living room photo. Even so, the whole room is rather small. The proportions of the furniture help keep it from feeling crowded.

This unfinished photo is the one for which President Roosevelt was sitting when he passed away.

There is a small garage apartment over the garage that is labeled "servants quarters", but these were a cook/housekeeper, and a driver/butler whose assistance was necessary to our paralyzed president.
The live-in housekeeper was not unusual even for middle class families who didn't have a grandmother living with them in those days when labor was cheap and goods expensive. Without the labor-saving devices that became common after WWII, help of some kind - whether family or hired - was essential. Notice in the kitchen photos how bare of "things" the kitchen was. Yet nearly all food was made from scratch or preserved at home, so much more time was involved in the preparation.
Oh, he and Mrs Roosevelt had luxury in their lives - both were from wealthy families and they did live in the White house, after all. But this little place where he escaped for treatments at the natural hot spring spa up the road in Warm Springs, and where his children came to spend time with him after they were grown, is by far the best example of an American Home of the era.
Although I am not decorating my little cottage in this same style, I do find much inspiration, and comfort, in these rooms.
The thing that most struck me about this house is how very ordinary it is. Anyone's grandmother could have lived here. There was no ostentation, no luxury. It is a simple home with maple furniture, twin beds, well-read books near the fireplace, and the comfort of homeliness.


 The kitchen had no cabinets, only open shelves along the walls. The things we would put into cabinets were stored in the pantry/closet - it was lined with shelves and is shown in the first picture, above.
They told us the living room is exactly as it looked the day he passed away. The nautical decor was a favorite of his, as he was a Navy man.
 President Roosevelt's bed, on which he was lying when he passed away suddenly from a stroke. The room is very small, with a single bed, and the furniture you see is pretty much the whole of the room. It is located right off of the living room.
 This was Eleanor's room, with a pair of twin beds. The guide told us that their children especially enjoyed coming to The Little White House, and would stay here in Mrs. Roosevelt's room when they came.
 The Dining Room is not separate, the table is simply across the room from the living area, with the hutch sitting opposite the fireplace shown in the living room photo. Even so, the whole room is rather small. The proportions of the furniture help keep it from feeling crowded.
This unfinished photo is the one for which President Roosevelt was sitting when he passed away.

There is a small garage apartment over the garage that is labeled "servants quarters", but these were a cook/housekeeper, and a driver/butler whose assistance was necessary to our paralyzed president.
The live-in housekeeper was not unusual even for middle class families who didn't have a grandmother living with them in those days when labor was cheap and goods expensive. Without the labor-saving devices that became common after WWII, help of some kind - whether family or hired - was essential. Notice in the kitchen photos how bare of "things" the kitchen was. Yet nearly all food was made from scratch or preserved at home, so much more time was involved in the preparation.
Oh, he and Mrs Roosevelt had luxury in their lives - both were from wealthy families and they did live in the White house, after all. But this little place where he escaped for treatments at the natural hot spring spa up the road in Warm Springs, and where his children came to spend time with him after they were grown, is by far the best example of an American Home of the era.
Although I am not decorating my little cottage in this same style, I do find much inspiration, and comfort, in these rooms.
Subscribe to:
Posts (Atom)