Showing posts with label Autumn. Show all posts

Wednesday, November 23, 2016

No Tools Required! Make A Firewood Holder In Five Minutes


At last, I found an easy, inexpensive, tidy way to store a few days' worth of firewood, just in time for cold weather. And I didn't even need to use any tools to make it, because the lumberyard made the cuts for me.

Our wood burning stove is our primary heat source, and I love it! I'm warmer in winter in this house than I've ever been in any home we've lived in. An old-fashioned box-type stove with no fans or windows or gadgets, needing no special kinds of fuel, it works perfectly to radiate warmth at an even temperature through our main living areas without drafts or cold/hot spots.

We store the cordwood we buy (or that my dad cuts for us) in the alley behind the fence, and I bring up enough for a few days at a time. This is where the problem has been - I've never found a good way to stack the wood I need near the carport door, to keep it off the ground, dry... and tidy.  The log holders sold in stores are either expensive, too small or else way too long for my space, or frankly, most look awfully flimsy.

Then I found this clever idea on Pinterest. Unlike so many of the elaborate projects on there, this looked like something I could actually make (LOL!).

I bought a couple of 8 foot long two by fours (they are actually about 1 1/2" by 3 1/2" because the mill measures before they are planed smooth), and two concrete cinder blocks. The ones I used are about 8"x8"x15".  Two by fours are stronger than one by fours, so they are best for this project.

The nice folks at Home Depot cut the lumber in half for me, so it fit into my Jeep Cherokee easily.

Stand the cinder block on their sides with the holes up, right against each other. They need to be touching in order to keep them stable. You'll need about 48" clearance width at the top.

Drop one four foot 2x4 into each hole and lean it out.  That's it!  Less than 5 minutes, not counting shopping time.  Total cost for everything - $13 and change.

I loaded several sizes of logs into it. You could also make two of them, and have one for large logs and one for smaller pieces and kindling.

Another new thing this year is twig bundles (see them on top?), which I made to see if they are more effective/efficient than just breaking small dead-falls as needed. With 3 full-grown pecan trees and one bur oak in our yard, we have a LOT of small limbs to dispose of over the course of a year. I just wrapped them up with twine. I've used them for my first fire and it certainly was simpler "at the time". My hope is that the twig bundles will work well for those warm Texas winter days we don't need an all-day fire but just need to knock the chill off.  

This little project is already getting our colder season off to a good start.  Thank you for stopping by, and I hope you stay toasty warm this winter! :-)

Friday, December 26, 2014

Home Remedies...It's Cold And Flu Season.


These are the home remedies I used while I was sick last week. They really work!


Thank you for watching. If you enjoy it, please click the "Thumbs up" button on You Tube, and please subscribe to my channel. No politics, just cooking, canning, stocking up, preparedness, foraging, nature lore, and How To! :-)  Maybe a little reenacting, cottage industry, and letterpress thrown in. :-)


Thanks so much and MERRY CHRISTMAS to all. May 2015 be a wonderful year full of happy adventures for all of us!

Wednesday, September 17, 2014

The Odd and Wild "Texas Persimmons" Are Ripening Now


The Wild Texas Persimmons are ripe! These turn black when ripe, and unlike orange persimmons, they don't need a frost. The trees are small and look almost like an under-story live oak, except their bark and trunks remind me of crepe myrtles.  They would be a good landscape tree - but they are male and female so you need several trees for them to be fruitful. Here is an excellent page to help identify and learn more about them:  BackyardNature.net's Texas Persimmons Page


Our friend Herb gave me a bunch and I turned some of them into Persimmon Jam. The final product is very tasty, reminiscent of molasses - dark and thick and rich and full flavored. They are don't have much acid in them, so the rest of the pulp I canned in my pressure canner.  Our friends tell us it makes fantastic persimmon bread. They made a wonderful pie, using a recipe that is similar to a pumpkin pie, nicely spiced with evaporated milk. I'll post the recipe here when I get it.


These fruit are quite challenging to process, because they are so soft, and each contains multiple large seeds. Putting them through a collander or a jelly strainer leaves far too much waste. I tried several different methods of separating the pulp and finally settled on using a strong mesh bag with very small holes. The ones with diamond shaped netting are too large and allow seeds to escape into the pot, but the bags that grapefruit, oranges, lemons and other citrus come in, with small square shaped holes, seem to be perfect for it. I just scoop the whole fruit into the bag and squeeze it with my hands until all the juice and pulp is out. This method also cleans the seeds well  - they are surrounded by a tough membrane that is as edible as the rest of the pulp but otherwise difficult to remove.

The color is very off-putting for me. It looks and feels like working in crude oil or blackstrap molasses and gets everywhere.  On the plus side, while the unripe ones make an indelible stain, the ripe ones seem to stain at about the same level as plum peelings. One woman, Deb McClintock, has been using the green ones as yarn dye (and wow does she have some gorgeous colors), and also the green ones were used to make ink. But they seem to reach a point on the tree that they will go ahead and ripen even if picked - which is not the case with the wild orange ones in my experience.

 Overall, the reliable test of ripening speaks strongly for these fruits. The American Persimmon that I grew up with in Oklahoma is difficult to rely on because of the need to be certain every single fruit is ripe before using them. These black ones can be confidently used when they are fully black and soft - no astringency at all at that stage.

I was also excited to get these because I want to save the seeds. I have a little display of native wild flower seeds that I sell at our Farmers Market and other events, and I wanted to add this great Texas Native to them. Also, reenactors may know that persimmon seeds were used as buttons during the difficult times during and after the civil war when real pearl or metal buttons were unavailable. They are very hard and naturally smooth, as well as uniform in size, which makes for good buttons.

There are not many trees that offer such a wide range of potential products in such a small package!

Friday, August 8, 2014

How To Make Fried Green Tomatoes, Served With Cream Gravy


We had fried green tomatoes and fried chicken livers for supper the other evening. Oh and cream gravy. I make livers fairly often but had never made fried green tomatoes (my family made chow chow out of the green ones). Paul told me how to do it and they turned out great, I am a fan!!!! 

Green Tomatoes are available early in the season when the vines have put on fruit but it hasn't ripened, sometimes throughout the summer, but especially in the Fall. Tomato plants and fruit will not survive a frost, so as temperatures drop, we have to remove the still-green fruit from the vines. These can be stored to ripen slowly over the winter (I have written before about how to do that), but that is also a perfect time to fry them up and enjoy them like this. 


Start with Green Tomatoes. They are very tart, but you can also use "Not Quite Ripe" - turning but still very firm - tomatoes for a sweeter taste. The cream gravy counters the acidic taste very nicely too. It you have had them in past, and they were too sour for you. try them with gravy and see if it doesn't make all the difference! :-)

 Slice them thickly, about 1/3 of an inch thick.

Dip tomato slices in flour, then into an egg wash (one egg beaten with 1/4 cup milk), then into bread crumbs. Let sit in a single layer on a cookie sheet  for a few minutes so the coatings will stick, then fry slowly until nice and brown. 

I used bacon grease to fry them in. About 1/4 inch deep grease in a skillet, get it hot and add the tomato slices in a single layer. Turn the stove down so that they sizzle but not very quickly, you want to fry these slowly. When brown on one side, turn them over and brown the other side. 

Drain on brown paper or even a wire rack, or paper towels. Serve warm. We especially like them smothered with cream gravy. Yummmmmm!!!!

Does everyone know how to make cream gravy or would it help if I added instructions?


Monday, September 23, 2013

How a Thank You Note Made My Day


Since the new Texas Cottage Food Law took effect September first, I have been baking bread to sell at our local Farmer's Market. It has been fun, because my bread always sells out and people are very happy to have it! Last week I took some to a small pioneer day event, and sold out there too.

The law requires that we put a label on our foods, and include our address on it. Today in my mailbox was the kindest Thank You note from a customer:

"Dear Friend,
My daughter and I visited Pioneer Day...on Saturday. She bought me a loaf of wheat bread. Oh my, it is wonderful. Had some on Sunday morning with ham and an egg. [here she drew a smiley face]  Made me happy all day. Love it. Thank you for sharing your time and talent with others.
Sincerely, [her name] "

This sweet lady and I do not know each other, so I was doubly enchanted by her note. Little kindnesses such as this add joy to life if we focus on "just for today".

This has given me much "food for thought" about this latest hobby, and the potential for good in the simplest things like real home-made food.

 I am going to miss these kinds of interaction when the Farmer's Market closes for the season in mid-October.

And I will look especially forward to having veggies to bring to it in the Spring!


.

Saturday, September 7, 2013

Plowing For a Winter Garden, and Getting Ready Now for Spring Planting


 We are going to raise a garden again. The deer and grasshoppers ate everything I planted this year, but we are going to fence out the deer and the Farmer's Almanac says it is going to be a cold, wet winter - so goodbye grasshoppers (please Lord?)!

Daddy came this past weekend and plowed the garden spot for us. I was impressed with his tractor skill - he can line that tractor up on a dime. He met right up with the stakes I had put out to define the space.  He said "after it rains, whenever that is, I'll come back and plow it again and that will kill a lot of the grass and weeds". And look, we had lovely rain the same weekend - just like washing the car except a GOOD rain-bringer. So I said "Thank you for the rain" to both my heavenly and earthly fathers! You can see in the pictures the difference in the color of the dirt while he was plowing, and after the rain!


 We have decided to use plastic mesh as fencing. Our primary goal is to keep the deer out and this product has really good reviews for such an inexpensive solution. It provides a visible barrier to animals and directs them to find another way to go. Eventually, the deer should forget there is food here. We can use steel u-channel posts that will stay permanently in the ground, and simply replace the plastic every few years.

This space was kept in production for many years by the folks who owned it during the 70s, 80s and 90s. The soil, we hear, is fertile. It has a good loamy feel to it. The big rocks in it are nodules of flint, which the Comanche and other tribes used to make their arrowheads out of. I need to do some research, because there is a great lot of this that I think would surely have been removed over time, unless new nodules keep working themselves to the surface. You can see several of them in the photo below


In Texas, we can grow things all year round. I will plant turnips, beets, chard, onions, garlic, and collards for winter growing. The freezes won't hurt them and the extra moisture will be a boon. Swiss Chard, Collards, Onions and Garlic will keep growing year round - they behave as either perennials or biennials.  Turnips are wonderful - use them like potatoes in stews or serve mashed and creamed. Turnip seed is cheap, and these root crops are easy to grow. They are good practice for amateurs.

Then, come February, I can start planting for early spring: peas, greens & lettuce, onion plants.  We must use "short day" onions here because whether onions make bulbs depends on the number of daylight hours they are exposed to. That is why those record sized veggies come from Alaska, the 24 hour days keep plants growing without stopping to "sleep" at night. In the South, our days are shorter. The longer growing season gives us a longer harvest and perhaps more production but does not give us larger individual produce.

Miss Fuzzy Slippers, of the blog Fuzzy Logic (linked from my sidebar), has a great article about the importance of learning to garden before we need to feed ourselves. For most of us, this is indeed a learned skill, not an innate talent, and we need to begin practicing now to accumulate the wisdom necessary for good harvests in our particular space.  Be sure to read the comments too, there are lots of practical tips in them.

Are you gardening this year? If you don't have a space in your yard, see if your town has a Community Garden. The nearest large town to us has very reasonable fees ($35 for the year) that include water and compost. It is a great deal, especially when you consider that using a community garden plot, like the British "allotments", also gives you direct contact with experienced gardeners who can help and advise you as you learn.  Contact them now just in case they have a waiting list.

Gardening is good for the body and the soul. There is just nothing quite like knowing you are working with God and His creation to make your own food, just like human beings have done since the very beginning.

Happy harvesting and good eating await!


Thursday, November 22, 2012

Happy Thanksgiving! The Immigrants Holiday Since 1540 AD


Happy Thanksgiving! It is 6:00 am and a beautiful morning. It will be just the three of us today: Paul, me and our granddaughter. I made the pies and cornbread last night, and Paul has the turkey marinating in brine. We added a ham to the menu, as Granddaughter doesn't care for turkey.

We have much to be grateful for.  We are Christians: assured of redemption, and secure in knowing we again will see our loved ones who have gone on before us.

We live in America, free to live, believe, work, think and speak; free to make for ourselves the best life we can on our own, not shackled into some hereditary "class" or trade, not under the thumb of hereditary governance.

We have great wealth, no matter our circumstances. Even the poorest among us have access to warm shelter, sufficient food, hope for a future better than our past.

I have never figured out how to "bump" posts without messing up the timeline, so here are links to Pecan Corner's most "classic" Thanksgiving Day posts. If you like them, please feel free to share. :-)

The Immigrants Holiday: Thanksgiving and The Original Melting Pot 

First Turkey Days! Thanksgiving Feasts in America 1540 - 1640 (or "The Real History of Thanksgiving")

God bless you, and God bless America!

(PS The Photo is of Wild Persimmon Trees on an Oklahoma byway. I took the picture when I went home for a visit last weekend. Mama and I had a lot of fun picking them - this was something she used to take us to do when we were growing up! They ripen in the fall, and are not edible until ripe - usually after the first heavy frost. But don't think just freezing them will work if they are not ripe yet. It won't! So you just have to stake out your tree and try to get there before the possums do! :-)  )


Thursday, November 24, 2011

We Occupied Our Own Home For Thanksgiving Dinner


What a nice day. It was a day to be thankful for. God has blessed us so abundantly. I hope we always remember to appreciate the blessings each moment carries for us.

It was just the two of us, but we cooked the full meal. I gathered some shrubbery and weeds for "flowers" for the table. We talked on the phone to all the various family strewn far and wide. Paul watched the Dolphins pull defeat out of the hat again. I took a nap! We cleaned up the kitchen together and the dishwasher is running. We just wrapped up with pumpkin pie and whipped cream.

I have a set of Lenox china. It's a plain pattern with no decoration but a simple platinum rim. So I pick up odd pieces here and there for variety. Since Lenox uses its distinctive "American Beleek" china as the base for all wares, it's easy - and beautiful - to mix & match.


I found (aka bought) this neat set of Bicentennial plates marked "Courtesy of the Delaware Fund", and used them today. There are four of them: one pictures Independence Hall, another Delaware's Old State House, another the Frigate United States "The Old Wagon".

And then there's this one. This plate pictures the New York Stock Exchange, on Wall Street.  Heh.

The irony was delicious, but not as delicious as Paul's turkey!

We are thankful today. Thankful to occupy our own home. Thankful to live in America. Thankful to have family and friends. Thankful that Jesus Christ came and died, and rose again, to give us the only real hope there is: the hope of eternal life with our Father God.

I hope that the sincere remnant who are taking part in the "Occupy" marketing campaign will someday know the kind of appreciation and gratefulness that comes of earning one's way past the debts & unemployment & low wages that young people in all eras struggle with.

It's a beautiful world, and life is worth the effort and work that a good life requires.

May God bless you and yours with grateful hearts this season.

Here's the Bible passage Paul used for today:

"Yours, O LORD, is the greatness and the power
and the glory and the majesty and the splendor,
for everything in heaven and earth is yours.
... Yours, O LORD, is the kingdom;
you are exalted as head over all.

Wealth and honor come from you;
you are the ruler of all things.
In your hands are strength and power
to exalt and give strength to all.

Now, our God, we give you thanks,
and praise your glorious name
."
I Chronicles 29:11-13 (NIV)

Thursday, November 17, 2011

Meteor Shower Tonight & the Wee Hours of Morning! November 17 & 18 2011


If you look toward the eastern horizon this evening, from about 9:30 Central Time "straight on 'til morning", you may be able to see falling stars in the Leonid Meteor Shower. This annual event is the beautiful debris of a disintegrated comet. It's called the "Leonid" because it appears (as we see it) in and around the constellation Leo the Lion (but these shooting stars aren't anywhere near those of the constellation).

Astronomers tell us the firedrakes can be seen in all parts of the sky, so you should be able to see it from anywhere in the United States - provided the half moon doesn't glow so brightly as to hide them from view. In fact, the best chance to see them may be by facing away from the moon - and from Leo - and look to the dark part of the sky.

But if you don't get to see it, mark your calendar and save the date for next year: they are predicting a "knock your socks off" display for 2012!

Thanks to Star Date Magazine, published by University of Texas, the McDonald Observatory, for the image used here - and for consistently marvelous information about our beautiful skies.

Praise the LORD from the heavens;
   praise him in the heights above.
Praise him, all his angels;
   praise him, all his heavenly hosts.
Praise him, sun and moon;
   praise him, all you shining stars.

Psalm 148 (New International Version)

Sunday, March 6, 2011

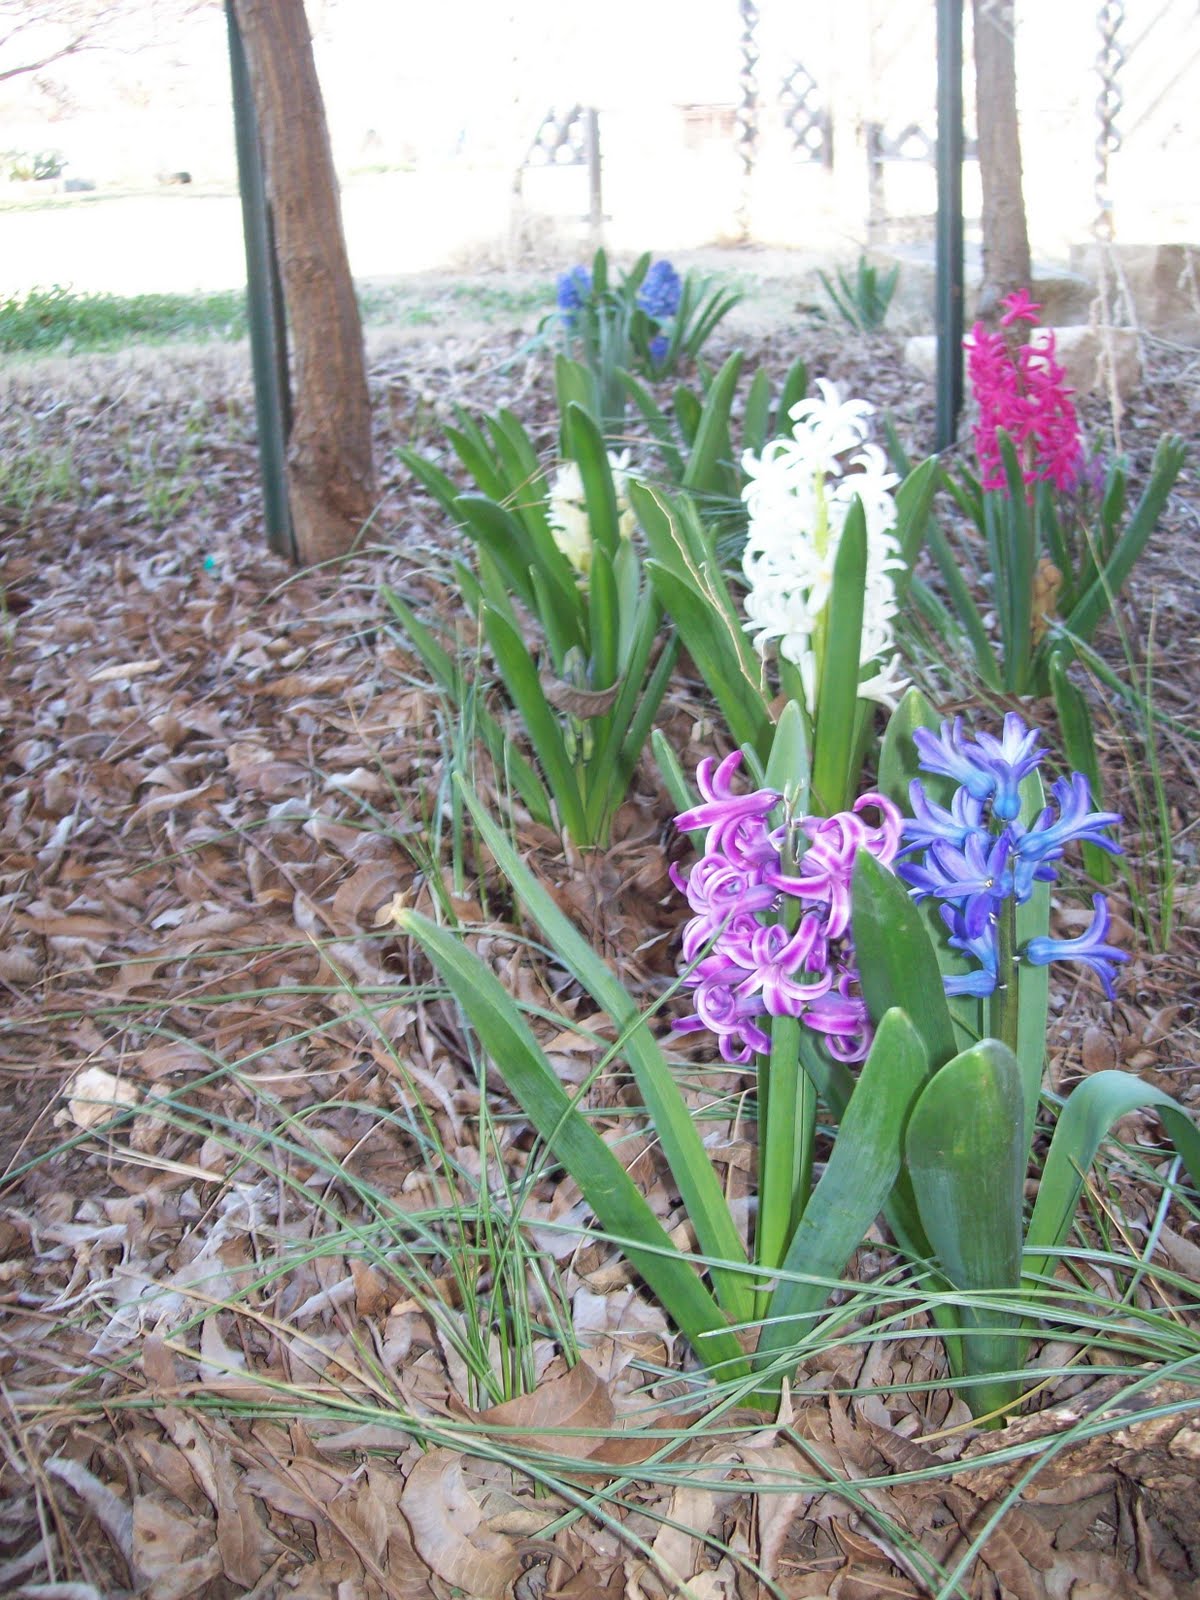
The Hyacinths are Blooming! One Blossom's Fragrance Fills a Room


Three years ago, I bought a "mixed bulb garden" assortment from one of the seed catalogs, and planted them in the fall.

The following spring, hyacinths became a part of my life. Oh my! Fragrance as rapturous as honeysuckle, and a single stalk will perfume an entire room for a week or longer.

Easy to buy: hyacinths are inexpensive, and available in most garden catalogs and at your local nurseries for fall planting.

Easy to plant: push a trowel into the ground in the autumn, drop in a hyacinth bulb and cover it over. Easy to care for: let them die back when they have finished blooming, then mow or water or fertilize whatever plants or grass cover the area the rest of the year.


Easy to enjoy: A superb cut flower, they will be beautiful and fragrant for seven to 14 days after cutting. Cheerful colors of red, white and beautiful blue are my favorites. Once a bloom stalk has opened most of its florets, cut the stalk, pop into a vase of water, and enjoy the heady perfume.

You can even force hyacinths, and stretch the season longer by chilling them in the fridge and putting the bulb in a container where the root end will sit on water - or a special "hyacinth vase". I haven't tried this yet but I think I will save a couple of bulbs this fall and try it. This website, www.kennemerend.nl/bollenglazen/ , has great photos of hyacinth vases, including antique ones. They remind me somewhat of a carafe: a sort of bottle shape, with a small neck and a top rim that widens to provide a reservoir in which the bulb sits. I've seen those odd shaped glass containers from time to time but never knew what they were for.


There's no need for any air freshener, potpourri or scented candles while you have hyacinths blooming. Because the fragrance is fully natural, the nose never ignores it, so the lovely scent catches my attention frequently each day.

I even carry the vase in & put it on the bedside table each evening, falling asleep to the fragrance of hyacinths. It joins the bird songs as one of the first things I become aware of when I wake in the morning.

Thursday, November 26, 2009

The Immigrants Holiday: Thanksgiving and The Original Melting Pot

The main historical storyline we celebrate is that of the pilgrims who came to Plymouth in search of religious liberty. Different factions of Christians were fighting each other in Europe at that time, and many people of new conservative beliefs sought refuge to live their faith in the ways their personal reading of the bible told them they should.

Many of these groups emigrated to the east coast of the United States, and formed one of several nuclei that would eventually lead to the founding of the first nation ever built from the ground up on Christian principles of liberty, equality, and faith.

We honor and remember those people, and why they came here - looking at the history as we have received it, rather than the new revisionist versions. To that, we can also expand our knowledge to learn about other thanksgiving feasts that were held during these early days.

Thanksgiving is called a secular holiday, but that does not mean God is not involved. The very word "Thanksgiving" means "Praying to God in Thanks". The very word "holiday" means " Holy Day". The reason it is called "secular" is because it was not a holiday mandated by a church or celebrating a specifically religious event. But it was and is no less a Holy Day of giving thanks to God.

The practice of offering a feasting day of Thanksgiving to God upon the arrival at a new land was a common practice of the Christians who explored and colonized America. These thanksgiving prayers and feasts were held by Catholics and Protestants alike, and where relationships had been established, all included the local native Indians as well as the travelers.

One of the earliest was held in what is now El Paso Texas. Don Juan de Onate led an expedition of soldiers and settlers along El Camino Real in a three month journey north through Mexico, crossing the Rio Grande and setting camp at El Paso. de Onate named the land "New Mexico" and claimed it in the name of Jesus Christ, and King Philip II of Spain. The feast of Thanksgiving was held on April 30 1598. It began with a Catholic Mass, and included ducks, geese and fish.

Other early feasts of thanksgiving to God for safe arrival include:

Captain John Woodlief's arrival in Virginia on December 4, 1619. This feast was planned before the group of settlers had left England, and was stated in their charter thusly: "Wee ordaine that the day of our ships arrivall at the place assigned for plantacon in the land of Virginia shall be yearly and perputually keept holy as a day of thanksgiving to Almighty God."

Pedro Menendez de Aviles celebrated a feast of Thanksgiving on arrival with 400 people to Florida, in September 1565. The Timucua Indians brought those native American foods we call "the three sisters": corn, beans, squash, as well as game and shellfish and joined the thanksgiving celebration. The Spanish cooked a big pot of stew with pork and beans cooked with onions.

And there are many others. All brought what they had, and tried new foods, together. The act of surviving an ocean voyage was a lot to be grateful for, and still is. The arrival upon a new continent, with the prospect of a hopeful, happy, prosperous future stretching out before you is a lot to be thankful for.

That this sense of thankfulness was celebrated by combining food offerings from all of the cultures gathered together laid the groundwork for the melting pot society that America became. America still is the great melting pot, despite the best efforts of elitists to try to impose various class systems and "cultural" schemes on the ordinary people. We The People invariably rise above that.


Because not just the pilgrims, but all of the immigrants to the New World were seeking relief from the settled ways of their old country that doomed them and their children to persistent persecution, poverty and servitude. This has continued to be true throughout our history.

In America, now as then, there is no peerage, no royalty, no caste system, no serfdom.
In America, now as then, it does not matter where you came from or who your parents were or where you got your education.
In America, now as then,you can choose where you live and how you make your living.
In America, now as then, you can convert from one religion to another without permission from the government.

That's a lot to be thankful for.

Thursday, November 19, 2009

Autumn Colors: Wooden Book Bindings

I had intended to write a post about autumn-themed book bindings. Time is short, the leaves are falling, but these pretty wood-bound books have a special place in any collection or library. They can also inspire us today, as we look to our own neighborhood for the things we want in our lives.

Most popular during WWII and the post-war period of the 1940s into the 1950s, this kind of binding gave heft to small editions of poetry and recipes. The wood was usually thin plywood, sanded smooth and given a coat of varnish or orange shellac (I love orange shellac) in the home workshop. As you can tell from the pictured examples, the hinges ranged from carefully worked copper to leather cord to metal rings. Covers would be decorated in a variety of methods, including wood burning, paint, stencil, and silk-screen.

The pages were often printed on a mimeograph or duplicating machine. In other cases, the printing was genuine letterpress - again frequently from a home print shop: either a hobby press, a home business, or perhaps a local printer whose main work would have been printing everything the town needed, including business cards and forms, stationery, books by local authors, and personalized Christmas cards.

"Geese Flying South" is a volume of poems by a local author from May, Texas. "Here's How" is a souvenier book of bartender's recipes from Asheville NC, and "Welcome Stranger" is a recipe book that was given out to newcomers who had just moved to Pompano Beach Florida.


The open book is a bound notebook that Mama made for my birthday. She and I had learned to sew these books together during one of my visits to her home. After she made the book, she pasted pressed flowers onto each page. The flowers were wild flowers she had gathered on a walk we took together when she was here visiting. Leafing through the book takes me through a full year of memories with her.


Whether it was a self-published book of poems, a small printer who printed and bound in his printshop on weekends, or the church cookbook that local craftsmen put together, this is just one more way in which people used to - and still can - rely on themselves and their neighbors to produce the things they needed, or wanted.

Imagine the possibilities if we stop wanting uniformity and recover our delight in our own handiwork and that of our neighbors!

Monday, November 2, 2009

Green Tomatoes, Winter Ripening and Chow Chow

Our neighbor - the one who grows amazing amounts of tomatoes in his yard and sells them wholesale - came in to where I work today . He asked about my garden and I told my tale of woe, that I didn't make tomatoes either at home or in my borrowed garden plot.

The vines looked good but most didn't fruit and those that did had poor quality. I told him I am going to try once more next year, and do things differently. He shared some tips with me, including the variety he likes best (Carnival), and to be sure and water every single day. He cages his, which I have not been doing but will do next year. And he told me not to put plastic under them as it will get too hot.

I bought a couple of flats of green tomatoes from him. Some of these green tomatoes I am going to store for ripening. My friend wraps each one in newspaper, and puts them in a single layer in a soda flat and stores them under a bed. She said she just took them out as needed, and each one ripened, and they all kept until they used the last of them in February.

Our neighbor said he has the best luck storing the ones that have gotten closer to beginning to ripen, that have turned a bit yellow-green, while the dark green ones don't keep as well.

One flat of the small, hard green tomatoes, I am going to use to make Chow-Chow. I do have my own onions and bell peppers for it, and I would have had to buy the cabbage anyway. I think the tomatoes will qualify as "local" since they were grown within 50 yards of the house! Heh! With luck I will be able to do that on Wednesday evening. Yum, I can't wait!

Dec 28th: Edited to add a link to the follow up post. Click here to check out how the green tomatoes are doing after two months of storage.

Thursday, October 15, 2009

Hoping For A Pecan Crop Today - and 500 Years Ago

I think the earliest mention of Pecans was in The Journey of Alvar Nunez Cabeza de Vaca, published in Anno Domini 1542 (on pages 78 and 79 of my copy). He talks about a particularly poor tribe of Indians who go each year to a place where there are nuts on which they will live for two months: "Even of that they do not always have, since one year there may be some and the next year not."

This is a true account, written by a shipwrecked Spanish sailor who traversed what is now the Southern United States, including Texas and Mexico, living with many different Indian tribes, and survived to return home to Spain and write his story.

It is a book worth reading - and surprisingly accessible, even easy to read (skip the introduction until after you've read the actual book). Cabeza de Vaca is a sympathetic and likeable hero and his story is a simple and unvarnished telling of what happened. The various descriptions of differing tribes and their highly diverse ways and means of life is worth the 3 or 4 hours it will take to read the book.

It is a book that may change some of your assumptions about a number of things.

You can download it from archive.org or from Google for free, don't even need a special "reader". You could even print it out. My copy is a facsimile (true copy) of the 1905 translation by Fanny Bandelier, published by Rio grande Press in 1964.

He also talks extensively about prickly pears: "tuna", and how important they were to some of the tribes as the mainstay of their diet for much of the year.


I picked up pecans yesterday afternoon, getting up the ones that have fallen before mowing for, what I hope will be, the last time this year. We have a Saint Augustine lawn, so it is easy to see them and I can move about on my knees comfortably. Year before last, I gathered nearly 100 pounds from this one tree. Last year, there was no crop at all to speak of. This year looks promising, I picked up maybe five pounds yesterday. This earliest tree is a Native, and its nuts are small, but they are richer, sweeter, with a much higher oil content than cultivated varieties.

I've mentioned that my trees all drop at different times. It also takes a matter of weeks for all the nuts to fall from a single tree, because I do not flail or shake my trees. If you have ever driven in the South and seen signs that say "No Flailing", now you know what not to do! No hitting trees with sticks from the road!


When I was growing up, lots of people picked up pecans as part of their living, and kids all did it to earn spending money. Southern Oklahoma is Pecan country and they grow wild all over. They remain a major crop for the area.

I take my pecans home to get them cracked, since the machines up there are set for small natives. Here, pecans are also a major crop, but the orchards are mostly cultivated and so the machines are set for cracking larger ones. The machines that crack them have to be set just right so as to crack the shell without breaking the kernal.

Once they've been cracked, they need to be picked out and stored. They will keep for a while at room temperature but will eventually turn rancid. For long term storage, Pecans can be vaccuum packed and frozen, and they will keep indefinitely.

Wednesday, October 14, 2009

Winter Harvest: Fresh Food in the Cold Months

In Texas, and perhaps to a degree in most of the country, food gardening can continue into the winter months. There is always something to be doing when one is raising food. I will be picking up pecans from now through December, as each tree drops them at different times.

I'm not planting a winter garden this year. There just is not time and energy for everything. But the Swiss Chard is holding its own and looking great for winter gathering. That is, the plants
inside the fence are. The ones outside we and the deer take turns with. The plants grow, we gather some, the deer eat the rest. The plants grow back, and so on. Swiss Chard is a biennial so will overwinter and be good for at least two years.


We still have onions that I grew and they are keeping nicely. They get hotter the older they get, but they have good flavor. I left a few in the ground and they just keep sending up green shoots through the winter, so there's a little green to liven things up. I will put out more onion plants in January. We grow what is called "short day" onions here, as they bulb based on the number of daylight hours - and our days are shorter than those up north. I have ordered plants from Dixondale Farms, a Texas company, so that I can get them early. I also buy some from the local produce or feed store when they get them in. That way I am sure they are a variety that will grow well in this country. I only set out the little plants that come in bundles, because the little bulbs never actually make for me.


My tomatoes did poorly and I have no green ones to store. My friend stores them, and she said they kept until February when they used the last of them. She gathers all the green ones right befoer the first frost, wraps each in newspaper, and puts them in a single layer in cola flats, under the bed. She said she just pulls one out and unwraps it when they need a tomato and surprise! Each is red and ripe and (she says) tastes lovely!

Last year we enjoyed turnips, beets and carrots as winter veggies that could be left in the ground and picked before dinner. Some of the turnips got a little woody toward the end of the season, so I will gather earlier when I grow them again. Parsnips would be a super choice for that but I haven't discovered the secret to those yet. Except that the tops do not look like carrot tops! Last batch I planted, I ...er..ah... I weeded the patch and only later found out I had pulled up the parsnip seedlings in error. *sigh*

This summer, I planted two kinds of winter squash: acorn and spaghetti. The acorn squash were great fresh but did not keep. Those stored in a dark place turned orange and dried up, those stored in refirgeration developed mold.

The spaghetti squash, though, turned out to be super keepers. I waited until their color had begun to get more yellow and they had a pale spot on the bottom (like watermelons) before picking them. I let them cure by sitting in a basket for a few days then put them in a net bag
and hung them in a dark closet. This was in July I think? Anyway, I cooked one of them last week and it was perfect. As far as I can tell they have all kept beautifully. I saved seed from it. I will definitely grow them again.


As the weather cools down, my peppers are finally behaving and making more peppers. They kind of stalled during the heat. If last year is any indication, I'll be able to gather peppers right up until frost.

I have Saffron Crocus bulbs to set out this week. It will be next fall before I know if they will do well for me, as they bloom in the autumn. I don't really think of them as food, but since I love to have flowers anyway why not have some that will also provide the most expensive spice in the world? :-)

Monday, October 12, 2009

Hackberries and Hackberry Firewood

There was a small hackberry scrub tree next to the road where I gathered prickly pears, and I had to eat a couple of the ripe hackberries. Wow that sure took me back to my childhood. They were "the" street tree in my hometown when I was growing up. The boys may remember the trees in front of Amos house, and one in Mema and Nandy's front yard? There also used to be hackberry trees lining 5th Avenue alongside Amos' house and going for blocks. These were all removed when they widened the road when I was about 12 or so.


There are many varieties of Hackberry, ranging from those that get large enough to be stately lining streets, to scrubby wild ones that grow out in West Texas. They are a rather short lived tree, maybe 50 years or so, and their wood is soft.


Birds love the berries, and they are a wonderful source of food for them. For people...not so much. Yes they have a great flavor, but have you ever eaten one? Imagine a BB (like you shoot from a bb gun), coated with apple peeling. That's it. The little bit of skin is the only thing edible - the inside is an indigestible hard ball. But that little bit of skin tastes just as good and sweet as apple peeling.

Because the berries are small and have no juice, they are not messy, thus their use as street trees.

People here tell me they use hackberry wood in the early part of the winter or spring when they only need a quick warm up to the house. It burns fast and takes the chill off on those cool mornings when you won't need a fire later in the day. I haven't had any of it, so I can't speak from experience yet. If I get the chance to get some from tree trimmers this year, I will try it.

UPDATE Aug 8, 2013: Winter before last, we discovered that some of our firewood was hackberry. How did we find out? Our neighbor came to beg us not to burn that wood any more because it stinks! Our stove is enclosed so we don't smell the wood, but one low pressure day had driven the smoke a block over to their house. When we smelled it we agreed it smells horrible! I am so grateful that she was willing to tell us about it. We threw away the rest of that and changed our source of wood. So nope, I can't recommend hackberry as a source for heat if you live anywhere near humans. :-(

Saturday, October 3, 2009

Autumn Decorating, Letters from Home, and Vintage Postcards

Today the Harvest Moon is full. Be sure to step outside your door and enjoy the beautiful sight of it rising over the next couple of days. It will rise tonight at 6:47 pm Central Time here, and, at 7:18 tomorrow night - so figure about half an hour later each night. You can find the moonrise times for your location from the link at the Farmer's Almanac, or from the links at Calculator Cat's Moon Phase site, pictured in my sidebar.

I had saved my corn stalks in hope of using them for harvest decorating in the yard. Alas, they did not hold up well enough to look good, so I made do with my little cane poles from the climbing beans.

Last year, I bought what I thought were bales of straw to decorate with, thinking to use them later as mulch. Turned out they were baled oats... so I had to pull "wild oats" out of the saint augustine grass all summer AND had to find someone to give the bales to. Our friend who goes to church with us and drives the garbage truck took them to his goats!

The crow scarecrow is so fun, and Mama gave me the "real" looking crow. A coworker gave me pumpkins he had raised, and some of those fruits are my own acorn squash. I grew acorn and spaghetti squash this year and dutifully cured them then stored in mesh bags in a dark closet. The acorn squash turned orange and dried out! Guess next year we'll eat them as they ripen.

The spaghetti squash still feel heavy, I plan to cook one this week and we will see if they kept well. But the dried acorn squash make for nice decorations in Thelma's wooden bowl.


This postcard came from Mama today. Isn't it great? She is the World's Best Letter Writer, and has taken to sending me vintage postcards. I save all of her letters in a file box and if she never writes her memoirs, the great great grands-yet-to-come in the far off future will have all these marvelous letters through which to get to know Amos, if they are not fortunate enough to know her in person.

It is such a fun idea, too, to send vintage postcards. They don't require much time to jot a few lines and cost only 28 cents to mail. Use a vintage (but previously unused) stamp, or the cute polar bear one that is out now, and it's a perfect little component of vintage living that we can add to our routine. And oh so much dearer than email: a keepsake from now on.

Monday, September 28, 2009

How To Make Prickly Pear Cactus Jelly Part 3

Be sure the see the first post (How to find and gather) and the second post (how to prepare the fruit and juice).

If you have not made jelly before, please do the safe thing and read up on specific canning methods, with up-to-date instructions before making this. The National Center for Home Food Preservation (linked from my sidebar) is a good place to go to start learning. If you have a dear one who knows how to can, call them and enlist their advice. Call your mom anyway, just for general principles.

Jelly is one of the easiest and safest home-canned foods you can make. I follow the instructions that come in the package of Sure-Jell, which is the brand of powdered pectin I usually use. For this batch I used Can-Jel, which is Kroger's brand, and it came out just fine. "Pectin" is a naturally occuring substance that causes fruit juice to gel when it is cooked with sugar. Apples, especially the peelings, have a great lot of it.

I always add extra pectin to my jellies and jams. I don't use liquid pectin, only the powdered type. However, my recipes all call for powdered pectin - be sure to use the type that your recipe calls for. It does make a difference!

Gather your jars, wash them and sterilize them with boiling water: either put the jars (jars only NOT the lids) in a pot of boiling water for 10 minutes (use canning tongs to remove them), or run them through your dishwasher's "sterilize" cycle. I always sterilize one extra jar just in case I need it.

Set them on an old towel in a handy location so that you will be able to easily ladle the hot liquid jelly into them when the time comes. Right next to the stove works best for me, and is safest. You do not want to be carrying a pot full or even a jar-full of boiling liquid jelly. The towel under the jars is to catch spills.

The Prickly Pear Jelly recipe I use is very similar to recipes for elderberry jelly. It makes about 11 half-pints. Since this recipe calls for 2 boxes of pectin, you could half it but do not double it.
If you need more, make 2 batches. Use only sugar for this recipe - do not reduce the amount of sugar and do not use sugar substitutes.

Only make jelly when you can give it your full attention from start to finish. It won't take long for the actual cooking and putting up but you cannot leave it once you start. So get everything else done in advance, but make sure you have an hour of uninterrupted time and turn the phone off before you turn the stove on.

You will need:
6 cups of prepared Prickly Pear Juice
1/4 cup lemon juice (either fresh or bottled)
9 cups of sugar
2 boxes of powdered pectin
1/2 tsp of butter or margarine (to reduce foaming)

Put your jar lids (the seal part) into a sauce pan of water and heat to boiling. Turn the fire down and keep warm.

Measure the sugar into a large bowl and set aside.

Measure 6 cups of prepared juice into a large spaghetti pot and add 1/4 cup lemon juice. Add both packages of pectin and whisk or stir well. Add 1/2 tsp butter - this will help keep the foam down once the jelly starts boiling hard.

Cook on high heat, stirring constantly, until it comes to a full rolling boil that cannot be stirred down.

While stirring, pour all of the sugar in all at once, and keep stirring over high heat until it comes back to a full rolling boil.

Don't take your eyes off it at this point.

Once it is at a full rolling boil, boil it hard for one full minute - this is important, use your timer if you can.

Turn the stove off and remove from hear and keep stirring until the boil dies down. If there is foam on the top, use a metal spoon to skim it off and discard it (I put it into a bowl and use it as my first taste after all the jars are sealed, but you shouldn't have much foam if you put the butter in).

Ladle the jelly into jars to within 1/8" from the top. When they are all filled, wipe off the rims with a wet cloth.

One at a time, get the lids out of the hot water with tongs and put lid and ring onto the jar. Tighten as tight as you can and set back down on a level surface away from drafts.


Repeat with all the jars, setting them close together so they will cool slowly. In about half an hour to an hour you should start hearing the sweet sound of lids popping as they seal.

Don't disturb them til the next day, then you can set them into a sink of clean water and finish getting the jelly off the outside, dry off and label. If they have sealed, they will keep for years.

If the seal didn't tighten they will still keep a long time, but you could either refrigerate those or process them in a boiling water bath if you want (per the recommendations of the NCHFP). Until recently -- oh sometime last week I'm sure -- we sealed jelly with paraffin wax and kept it until we used it up!

LinkWithin

Related Posts with Thumbnails